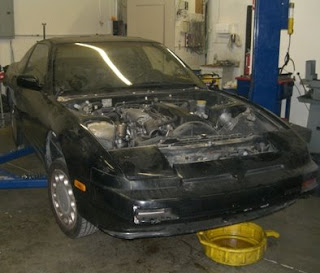
I don’t want anyone thinking that this is a Z blog, so I’ll include something else. Here’s an Oil Catch Tank we made a little while back. There’s baffling and a lot of mesh to separate the oil and gasses. Making the breather hole on top was pretty fun.
Sunday, May 25, 2008
Oil Catch Can
Project Z Goes Belly Up
According to Mr. Wakita, "we're not doing a full restoration project, so don't really need to buy/build a rotisserie." Which is true. In our day-to-day operation, we don’t really need something like that. But it’s almost necessary to flip the car to install the rear subframe. So we flipped the car, and put it on the lift.
In hind sight, it would’ve been great to hold off mounting the front subframe until now. But then again, we weren’t planning on flipping it until Friday.
Friday, May 23, 2008
Got Camber?
Thursday, May 22, 2008
Even with a KA...
Front Suspension Finally Completed...
Here's the shock mount we made to fit the Z. To get this finished product in this picture, we had to make several alignment tools and a punch.
Here's the pic of the upper shock mount and the punch we made. It's an interesting exercise in manufacturing.
Monday, May 19, 2008
More on the VK56
This is the VK56 we'll be putting in the Rolls. Internally, it's been modified in three ways: Forged Pistons, Rods, and it's been Ported and Polished. Externally, though, there's a whole lot of work that went into it. All of the accesories are from the Rolls/BMW V12; AC compressor for the climate control to work properly, PS pump 'cause it also controls the ride control, and the Alternator just for fun.
The VK56, like the VQ35, has a cam angle sensor and a crank angle sensor. We didn't really like that look, so we plugged it up.
And we put a custom Cam Angle Sensor sourced from various Nissan parts. Without giving too much away, here's what we did.
1.6L Turbo
Blue R34
Black R34
Friday, May 16, 2008
Do Luck Cage for the S13 Hatch
To most, incluiding myself, this does not seem like a big deal. The RHD and LHD cars are essentially the same car (minus the engine and the fact that the steering wheel's on the opposite side). There's one VERY critical difference that I had overlooked--seatbelts.
In the late 80's the US government mandated cars to be equipped with SRS (Supplemental Restraint Systems). Airbags were a luxurious item to have on a car back in the day, so some manufacturers decided it would be cool to have automatically retracting seatbelts. The 240SX was a victim of that era. That's enough of a history lesson for today.
The question is, what does this mean to anyone trying to install this cage? See below picture:
That gaping hole is where the lap belt sits in. Not that difficult, but annoying.
In addition, I had one more concern. Notice the footprint of the cage in the trunk. There are no preexisting mounting holes (RHD or LHD). Upon careful translation of the manual (it looks like a 3rd grader drawing), I’ve found Do Luck has designed this cage to be bolted in with 8mm tapping screws! Weak… I’ll be addressing that issue I’d like to call a design flaw.
Best of Both Worlds
The problem doesn’t surface until several months after the installation—some don't even notice it at all. It all depends on how often you drive the car, but in my experience, 6-8 months is the lifespan expected out of the rod end—this is true regardless of origin or material. I’ve tried just about everything from metal on metal to metal on teflon, Chinese to Aurora, and everything in between. The more you pay, the better they last, but only by a month or two.
What happens, no matter what the bearing/liner is made out of, it's a simple fact of wear and tear. It's metal on metal contact. It has to wear out sometime. But what about the Teflon lined rod ends? They are probably great in theory, but fact is, the lining is not as strong as steel, and they wear out eventually.
I'll try to post some pics of various rod ends I've cut open.
Here’s my solution to get the best of both worlds. A firm, but not jarring, ride with the adjustability of the aftermarket pieces. I guess the downside would be cost. They are a pain to make.
I used the bushing sleeve from a S14 (I think... the wall was thicker than the S13, anyway.) Then I cut the rod end and ground it down to fit flush with the sleeve, and welded it together.
These will get assembled to make a slightly custom tension rod for an S13.
From L to R: A slightly customized Shutoko Engineering Tension rod, Cusco Tension rod, and a stock S13 tension rod.
Thursday, May 15, 2008
Drag R32 AWD to 4WD
Flat Tire
Another Odd Couple
The old-school way to fill holes
We've drilled out several brackets to clean up the engine bay (MAF, Battery, etc.) Unfortunately, the removal involved drilling the welds. Here, you see Mr. Wakita is hard at work to fill those unsightly holes.
The almost completed picture. We've drilled a couple dozen holes in the engine bay, so we'll be doing this for a while. Once we get done filling them and finish the spot welding, we'll smooth out the surface.
Monday, May 12, 2008
VK56 Port
Odd Couple
Another thing you don't see eveyday: The underside of a RollsRoyce Phantom.
Sunday, May 11, 2008
Out with the old, in with Reinforcements
Besides, there's always a possibility that the old brackets might get in the way when we put the motor in. So we seized the opportunity to make it just a little better: Gussets.
The thought about tying the subframe in with these reinforcements crossed my mind, but unlike Z, the steering rack sits behind the subframe, we don’t have the rack yet, and this car is a street car.
Thursday, May 8, 2008
Front Subframe
G35TT Exhaust
G35TT
Now this is one crazy G35. It's got two HKS 3037S turbos. TWO!!! To put that into perspective, here's the clearance looks like with something like that.
Wednesday, May 7, 2008
R32-42R
Weldon Pump is Back!!!
Project Z
Actually, We'll be getting a sacrificial S13 for the build that we'll "borrow" parts from. The actual fabrication process will begin once we get the donor. For now, just a whole lot of measuring, measuring, and some more measuring...